


Deciding to start yoga at home is one of the most rewarding things you can do for yourself. Forget the idea of needing a fancy studio or complicated gear. It’s really just about carving out a small slice of time and space to reconnect with your body, calm your mind, and gently ease away tension. All you need is a quiet corner and the willingness to begin.
Starting Your Home Yoga Practice with Confidence
Embarking on a yoga journey right from your living room is a powerful way to invest in your own wellbeing. It gives you the freedom to move at your own speed, really listen to what your body is telling you, and create a routine that actually fits your life—without the pressure of keeping up with a class. Many people find this personal approach helps them connect more deeply with the practice, right from the very first session.
The whole wellness world has shifted, making it easier than ever to get started. While Australia has a massive yoga studio market, there’s been a huge move towards online classes. This trend has opened up a world of professional guidance for anyone wanting to practise at home. A quick look at the growth of digital wellness offerings shows just how accessible expert instruction has become.
Why Start Yoga at Home?
Choosing to begin your practice at home comes with some pretty amazing perks, especially when you’re just starting out.
- Total Privacy and Comfort: You can wear your favourite comfy women's yoga activewear, wobble through a pose without feeling self-conscious, and truly focus on how each movement feels in your body.
- Ultimate Flexibility: There are no class schedules to stick to. Whether you have 15 minutes in the morning or 30 minutes before bed, your yoga mat is always there for you.
- Cost-Effective: While studios offer a wonderful sense of community, starting at home means no membership fees. You can put that money towards a few quality essentials that will last for years, like a really supportive yoga mat.
The goal isn’t to perfect a pose on day one. It's about showing up for yourself, breathing deeply, and discovering the strength and peace that are already within you. Your home is the perfect sanctuary to begin this exploration.
Creating Your Personal Yoga Space at Home
You absolutely don’t need a dedicated studio to start your yoga practice at home. Honestly, a small, quiet corner is all it takes. The real goal is to carve out a space that feels calm and signals to your brain that it’s time to switch off from the day's chaos and tune in to yourself.
This simple act of designating a spot, no matter how small, is a powerful trick for building a consistent habit.
Find an area with minimal foot traffic where you know you won’t be interrupted. It just needs to be large enough for you to stretch out comfortably on your mat without knocking anything over. If you're working with a snug apartment or a multi-purpose room, these handy tips on how to organize small spaces can be a lifesaver.
Once you’ve picked your spot, the first thing to do is clear away any clutter. A clear space helps create a clear mind.
Setting the Atmosphere
The right environment can make a world of difference in your practice. Soft, natural lighting from a window is ideal, but a simple dimmable lamp works just as well to create a gentle, relaxing mood.
You can also introduce calming scents to deepen that sense of peace. An essential oil diffuser is an incredibly easy way to do this. Scents like lavender are famous for their relaxing properties, helping to soothe anxiety and prepare your mind for practice. Just a few drops can completely transform your corner into a personal sanctuary.
Your yoga space is your personal retreat. It doesn’t have to be perfect, but it should feel supportive and inviting to you. This is where you come to connect with yourself, so make it a place you genuinely want to be.
Gathering Your Essential Gear
While yoga doesn't require a lot of fancy equipment, a few key items will make your practice safer, more comfortable, and ultimately, more effective. Think of them as foundational tools that support your body as you learn and grow.
Here’s a rundown of what you truly need versus what’s nice to have as you progress.
Essential vs. Optional Gear for Your Home Practice
When you're just starting, it's easy to get overwhelmed by all the yoga accessories out there. The truth is, you only need a couple of things to begin safely. This table breaks down what's truly essential from the get-go versus what you might consider adding later on.
| Gear Type | Why It's Important | Our Recommendation | Budget-Friendly Alternative |
|---|---|---|---|
| A Quality Yoga Mat | A good mat provides crucial cushioning for your joints and a non-slip surface for stability, especially in standing poses. This is your most important investment. | Our supportive yoga mats offer a great balance of grip and comfort. For sweaty practices, check out our guide on using a yoga mat towel. | A non-slip rug or a carpeted floor can work in a pinch for gentle flows. |
| A Meditation Cushion | While not for poses, a firm cushion is invaluable for sitting comfortably with a straight spine during opening and closing meditations, preventing discomfort. | A zabuton meditation cushion provides excellent support for your hips and back, allowing you to relax fully. | A firm couch pillow or a stack of neatly folded blankets works perfectly. |
| Yoga Blocks | Blocks bring the floor closer to you, helping you maintain proper alignment in poses where you can't quite reach, preventing strain and injury. | Two sturdy foam or cork blocks will support you through a huge range of poses as you build flexibility. | A stack of thick, sturdy books (like textbooks) or a couple of solid, same-sized containers. |
| Yoga Strap | A strap helps you gently deepen stretches and achieve poses that are just out of reach, particularly for tight hamstrings and shoulders. | A simple cotton yoga strap with a D-ring buckle is a versatile and long-lasting tool for any practitioner. | A bathrobe belt, a long scarf, or even a towel can do the trick. |
Don't feel pressured to buy everything at once. Start with a good mat and see what your body needs as you begin to explore different poses. The best props are the ones you actually use
Your First 20 Minute Beginner Yoga Flow
Alright, your space is set and your mat is waiting. Let's dive into your very first yoga flow. This simple 20-minute sequence is designed to be a gentle handshake with some of yoga’s most foundational movements.
The aim here isn’t to create perfect shapes. Not at all. It's simply about connecting your breath to your body, listening to what it tells you, and slowly building a bit of confidence on the mat.
Before you start, make sure you're in something comfortable and stretchy that won't hold you back. Let's get moving.
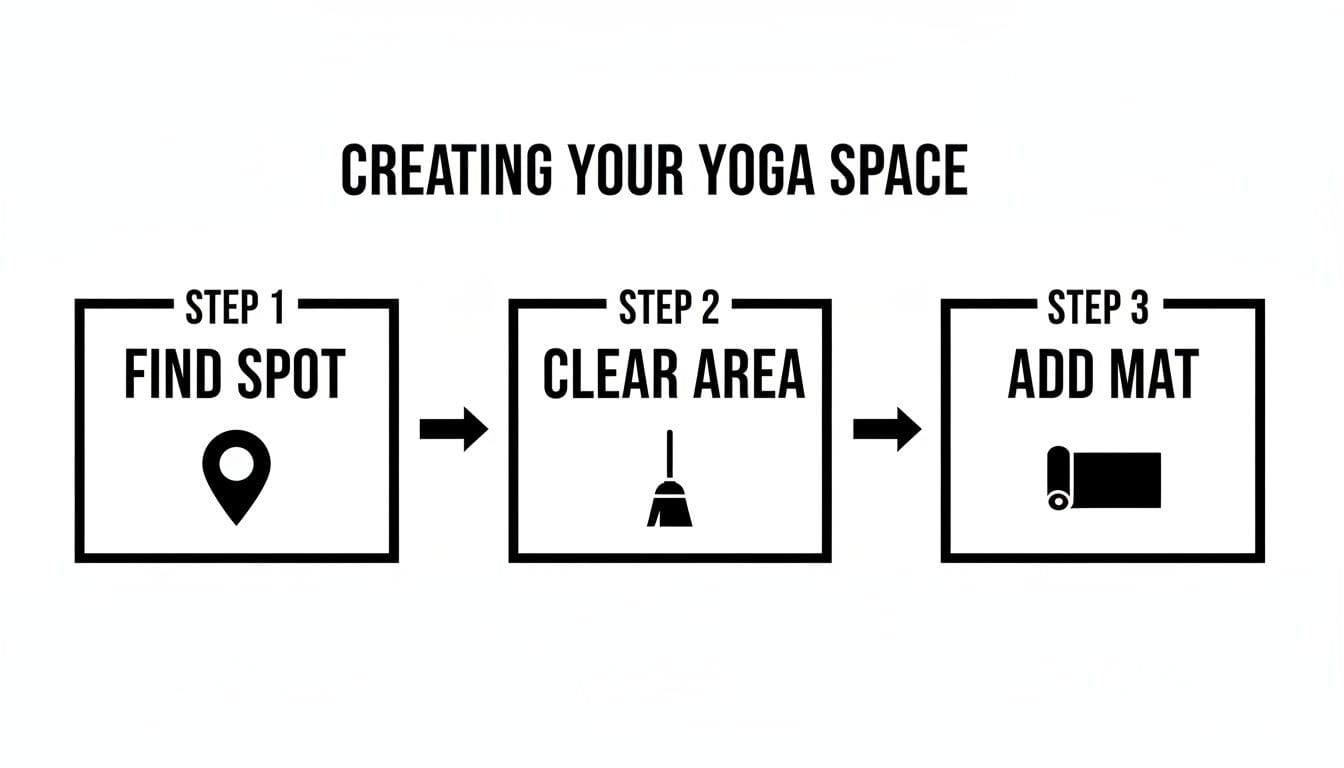
As you can see, carving out your practice area is a quick three-step process. It's a simple ritual that signals to your brain that it’s time to switch gears and focus inward.
Gentle Warm-Up (5 Minutes)
Find a comfortable seat on your mat to begin. You can sit cross-legged, maybe propping your hips up on a folded blanket or cushion to help you sit up tall. Let your eyes drift closed and take three deep, cleansing breaths—in through the nose, and a long, slow sigh out through the mouth.
From your seat, gently make your way onto your hands and knees into a tabletop position.
- Cat-Cow Pose (Marjaryasana-Bitilasana): This is a beautiful way to wake up the spine. As you inhale, let your belly drop towards the floor and gaze forward, arching your back into Cow pose. As you exhale, press the ground away, round your spine, and tuck your chin towards your chest for Cat. Flow between these two movements for 8-10 rounds, letting your breath guide the pace.
- Child’s Pose (Balasana): From tabletop, bring your big toes together, widen your knees a little, and sink your hips back towards your heels. Let your forehead rest on the mat. Your arms can stay stretched out in front or rest alongside your body. Settle in and take 5 full breaths, feeling your back expand with each inhale.
Building Foundational Strength (10 Minutes)
Now that you're a little warmer, we'll move into some foundational poses. The key is to move with intention, noticing how each shape feels in your body. Forget about what it should look like and focus on what you feel.
-
Downward-Facing Dog (Adho Mukha Svanasana): From your hands and knees, tuck your toes under, take a breath in, and as you exhale, lift your hips up and back into an inverted 'V' shape. Bend your knees generously here! The priority is a long, straight spine, not straight legs. Press firmly through your hands and breathe here for 5 deep breaths.
-
Warrior I (Virabhadrasana I): Look forward and step your right foot between your hands. Pivot your back heel down to the mat so your foot is at about a 45-degree angle. Bend deeply into your front knee (aiming for a 90-degree angle) and lift your arms up to the sky. Hold for 3-5 breaths, then release back to Downward-Facing Dog and repeat on the left side.
-
Mountain Pose (Tadasana): From Downward-Facing Dog, slowly walk your feet up to your hands. Let your head hang heavy for a moment, then slowly roll all the way up to a standing position. Stand tall with your feet either together or hip-width apart and let your arms rest by your sides. Feel the ground beneath you. This simple pose is all about finding stability.
Remember, you're looking for a gentle stretch, never sharp pain. If anything feels too intense, just ease back a bit or try a modification. Props are your best friends in yoga; a block can bring the floor closer to you and make poses much more accessible. For some great ideas, check out our complete guide to using yoga cork blocks.
Calming Cool-Down (5 Minutes)
The final few minutes of your practice are dedicated to winding down, allowing your body and mind to absorb the benefits of your movement.
-
Bridge Pose (Setu Bandhasana): Lie down on your back. Bend your knees and place your feet flat on the floor, about hip-width apart and close enough that you can touch your heels with your fingertips. Press into your feet to lift your hips from the mat. If it feels okay, you can clasp your hands on the mat beneath you. Hold for 3-5 breaths and then slowly lower back down, one vertebra at a time.
-
Corpse Pose (Savasana): This is the most important pose of all. Lie flat on your back, let your feet fall open naturally, and rest your arms by your sides with your palms facing up. Close your eyes. Allow your body to feel heavy, supported completely by the floor beneath you. Stay here for at least 2-3 minutes, doing nothing but noticing the gentle rhythm of your own breath.
Enhancing Your Practice With Breath and Rituals
As you start to get comfortable with the physical shapes of yoga, you’ll quickly realise the practice goes far beyond just movement. It’s a chance to connect with your breath and create small, meaningful rituals that genuinely calm your mind. These simple additions can transform your at-home yoga session from a workout into something deeply restorative.
The simple act of focusing on your breathing has a profound effect on your nervous system. Think of it as an anchor that keeps you in the present moment, pulling your attention away from a racing mind and back into your body. It’s the true foundation of your entire practice, whether you're moving or sitting in stillness.
A Simple Breathing Exercise
Before you begin your sequence or as you’re cooling down, give Box Breathing a try. It’s an incredibly effective way to centre yourself.
- Find a comfortable seat on your zabuton meditation cushion, making sure your spine is tall.
- Gently close your eyes and let all the air out of your lungs.
- Slowly inhale through your nose for a count of four.
- Hold your breath at the top for another count of four.
- Gently exhale through your nose for a count of four.
- Pause at the bottom for a final count of four.
Keep this cycle going for 2–3 minutes. You'll be surprised at how this simple, rhythmic pattern can still the chatter in your mind.
Your 5 Minute Closing Meditation
After your final Savasana, gently make your way up to a comfortable seated position. This is the perfect time for a short meditation to really seal in all the benefits of your practice. It doesn't need to be complicated at all.
Just sit tall, rest your hands on your knees, and close your eyes. Bring your awareness back to the natural rhythm of your breath without feeling the need to change it. Your only job here is to notice the sensation of air moving in and out of your body. If this is new territory for you, our guide on how to start meditating at home for beginners has more foundational tips.
When your mind wanders—and it definitely will—just gently guide it back to your breath. That simple act of returning your focus is the entire practice. Spend five minutes here, just soaking in the stillness you’ve created.
For those just starting out, exploring a guide to sleep meditation for beginners can be a great complement to your yoga, using similar techniques to calm racing thoughts and help you unwind before bed.
Post-Practice Rituals for Recovery and Wellbeing
What you do after you roll up your mat is just as important as the practice itself. Creating some simple post-yoga rituals helps support muscle recovery, replenishes your energy, and extends that sense of calm you’ve just worked so hard to cultivate.
Here are a few ideas to get you started:
- Nourish Your Body: A smoothie with a scoop of high-quality vegan protein powder is perfect for replenishing your muscles. For deeper cellular support, I love adding Teelixir mushroom supplements to help with recovery and vitality.
- Mindful Hydration: Instead of rushing off to the next thing, take five minutes to sip on a warm, calming drink. A cup of antioxidant-rich matcha green tea gives you a gentle lift without the jitters you might get from coffee.
- Deep Recovery: On days when your practice was a bit more intense, a portable ice bath can work wonders. It’s brilliant for reducing muscle soreness and inflammation, helping you recover much faster.
Participation trends in Australia show a clear move toward digital platforms that make home practice easier. In fact, about 38% of instructors are now in private practice, many offering online or hybrid services. As outlined in this recent fitness industry report, this shift means beginners have more access than ever to guided programs that support a well-rounded at-home yoga journey.
How to Build a Consistent Practice You Love
The real magic of yoga doesn't happen in one perfect session. It unfolds slowly, through consistency. Turning up on your mat regularly is how you transform these movements into a habit you genuinely look forward to. This simple plan is designed to help you find that rhythm without feeling overwhelmed from the get-go.
The secret to making it stick? Start small. Seriously. Forget the pressure to practise for an hour every single day. Instead, just aim for two or three 20-minute sessions each week. It’s far more achievable and helps you build momentum without burning out.
Your First Four Weeks of Practice
Think of this as a gentle roadmap, not a strict set of rules. The whole point is progress, not perfection. Listen to your body, adjust when you need to, and make this practice your own.
Week 1 Goal: Just Show Up for Yourself
Your only job this week is to get on your yoga mat twice. That's it. Focus on simply moving through the 20-minute flow we outlined earlier. Don't get caught up in getting every pose "right"—just move and breathe.
- Focus: Familiarity and consistency.
- Tip: Schedule your two sessions in your calendar like they're appointments you can't miss.
Week 2 Goal: Deepen Your Breath
Practise two or three times this week. In each session, bring a little extra awareness to your breathing. Try to consciously link every single movement to either an inhale or an exhale. You'll be surprised how much this changes the feeling of your practice.
This is where the mind-body connection really starts to click. When you anchor your movement to your breath, your practice becomes a moving meditation, calming your nervous system with every flow.
Week 3 Goal: Explore a New Pose
Aim for three sessions this week. Add just one new pose to your flow. It could be as simple as trying a Low Lunge instead of Warrior I, or maybe exploring a gentle seated twist. This keeps things interesting and helps build your confidence.
- Focus: Gentle progression and curiosity.
- Tip: Make sure you're wearing comfortable women's yoga activewear that lets you move freely as you explore new shapes.
Week 4 Goal: Create a Ritual
Keep going with three sessions. This week, the focus is on what happens off the mat. Create a small ritual you can look forward to. Maybe it’s sipping a calming tea made with Blue Lotus on your rest days to promote deep relaxation. Perhaps it’s blending a nourishing smoothie with vegan protein powder right after your practice to help your muscles recover. This little trick, known as habit-stacking, links your yoga to another enjoyable activity, making you much more likely to stick with it long-term.
Your Common Questions About Starting Yoga at Home
Starting anything new, especially a practice as personal as yoga, is bound to bring up a few questions. That's completely normal. Feeling a little uncertain is just part of the process, so let's walk through some of the most common queries I hear. My goal is to help you feel confident and ready to roll out your mat.
How Often Should I Practise as a Beginner?
Aiming for 2-3 sessions a week is a brilliant and, more importantly, sustainable starting point. This gives your body plenty of time to recover, adapt, and build strength safely between practices—which is exactly what you want when you're new to the mat.
You don't need to block out an hour, either. A solid 20–30 minute session is more than enough to start feeling the benefits. The real key here is consistency, not intensity. Once you feel stronger and more comfortable, you can always think about adding more sessions or making them a little longer.
What if I Can't Do a Certain Pose?
First off, welcome to the club! It's completely normal not to be able to do every single pose, especially when you're just starting. Yoga is a deeply personal journey, not a competition. The whole point is to listen to your body and honour exactly where it is today.
Most poses have modifications to make them more accessible. For instance, if you can't touch your toes in a forward fold, just bend your knees as much as you need to. If you ever feel a sharp pain, that's your body's signal to gently back off. Using props can be a game-changer, too—a quality yoga mat gives you grip, while a firm meditation cushion can make seated poses feel so much better.
The big secret? It’s all about how a pose feels in your body, not how it’s “supposed” to look. Your version of the pose is the perfect one for you.
How Do I Stay Motivated to Practise at Home?
This is often the biggest hurdle, isn't it? One of the best tips I can share is to schedule your yoga time in your calendar, just like you would any other non-negotiable appointment.
Making your practice space feel special also helps immensely. Turn your little corner into a retreat. You could light an essential oil diffuser with an uplifting scent to set the mood. Another great trick is to pair your yoga with something you love, like sipping a warm, calming cup of matcha afterwards. This little ritual helps your brain form a positive connection, making the habit stick.
Do I Need Special Clothes for Yoga?
You definitely don't need to splash out on expensive gear, but wearing the right kind of clothing makes a world of difference. The main thing is to choose comfortable, breathable, and stretchy activewear that lets you move freely without feeling restricted.
Our range of women's yoga activewear is designed to move with you, giving you the support and comfort you need. That way, you can focus on your poses and your breath—not on what you're wearing.
Ready to create a practice you truly love? Explore our full collection of supportive yoga and wellness essentials at Wellness Apothecary and find everything you need to begin your journey with confidence and calm. Shop our collections today.


